A few weeks later, I received a very tempting parcel that was ripped open in a very exciting manner.
Friday, 4 October 2013
#secretsewingproject ...
A few weeks later, I received a very tempting parcel that was ripped open in a very exciting manner.
Monday, 8 July 2013
Nothing if not predictable ...
It was always on the cards that there would be a cushion to sit atop my new quilt. It is the best way to use up the scraps from a bigger project and I wanted to eek out the Flea Market Fancy love as much as possible.
I decided on making the back-to-front version of the quilt block by using the plain white as the flower.
It gave me lots of scope to keep playing with my perle threads for the hand-quilting. There is something extraordinarily satisfying about a simple running stitch, both in terms of actually doing it and the finished result.
So my bed now has a summer look, and one that I am extremely happy with. Although with this wonderful warm spell, the quilt is being thrown off with abandon!
Friday, 1 February 2013
feather your nest ...
Do you see that little shop widget over there --->
(Perhaps not, I guess, if you're reading on Reader or your mobile device, you'll have to take my word for it!)
Having an Etsy shop is a project I have been thinking about for a very long time; a project that I have been working on for quite a long time; and finally, after all that time, have had the confidence to open up its doors.
After much procrastination I found that, along with some amazingly supportive friends, the Universe sent me a couple of gentle prods to set the ball rolling. I pinned the above picture just recently as I believe this to be very true of me. I cannot help making things and I'm certainly not happy if I am unable to make things.
But who knew that there would quite so many things to think about in opening up an Etsy shop? The actual making of the things I wanted to sell was the easy bit - I've had to think about mail bags and wrapping, postage costs, what I wanted to be a strong point for selling my wares. Many, many details that have kept me awake at night.
Then there was the actual name of the shop itself. 'feather your nest' was always my first choice but after trying to get past the first page of the Etsy template, I realised it wasn't very original. Other names were toyed with but there was always a negative comment when I was trying them out on people to get some feedback that really put me off and so I always found myself back at my first idea. Hence the numbers on the actual web address, which aren't ideal but I can live with it!
The biggest hurdle I had to overcome was one of pricing. It is a minefield and then serendipity handed me the thing I needed to read. Arounna sums it up perfectly in this blog post. I read it, digested it and it was the final thing my confidence needed to hit the 'open shop' button.
It feels good to have a direction to take my creative sewing in and I'm looking forward to becoming part of the Etsy community. I'd love for you to have a wander through and let me know what you think. I'm happy to do custom orders too so if there is something that you like but maybe have your own ideas or colours, then I can make it happen for you!
Wednesday, 16 May 2012
Revamp...
It goes with the territory of loving fabric, I suppose. They are quick and easy to make and a great way of trying out techniques or patterns on a smaller scale than a quilt.
The quilt WIP that I posted about last week is this pattern, which I'm loving, and so I thought it would be fun to upsize a block and make it cushion-sized. I cut the squares at 5½" rather than 2½" and it just about fitted a 20" cushion pad. I adore those peacocks!
I used my usual method of an envelope back, added a tiny bit of the selvedge as a label and made binding to sew the fronts and backs together.
For the two smaller cushions, I just sewed strips of the remaining fabrics together and did a bit of slicing and dicing to make the fronts.
Then I got stuck into a tutorial* that I have had bookmarked forever for inserting an invisible zip. I bought both the zips and the special foot for my sewing machine some time ago too and have been waiting for an opportunity to get stuck in. Would you believe me if I said it was simple? Really, it was.
Very neat, even if I do say so myself. There will be more of these to come. I can feel it.
They brighten up the conservatory and they hide a sofa that I'm not that keen on but happens to be very comfy and has lasted for years.
Most importantly, they get the paws up of approval.
*the tutorial is actually part of this pattern which I purchased but I'm sure there are others out there.
Wednesday, 15 February 2012
A Bee in my Bonnet...
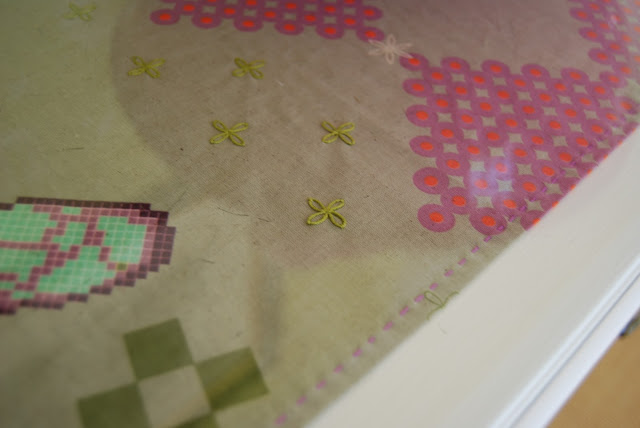
I bought half a metre from The Eternal Maker and therefore only had one whole bee in the piece of fabric which I put to use in a mat to sit underneath the glass top of this washstand I have recently renovated and painted for my bedroom. I hand-sewed a simple running stitch hem with perle thread and some lazy daisy stitches over some of the printed details on the fabric.
Along with a roll of wallpaper by Rob Ryan that I spotted in Grand Designs magazine while I was in the hairdressers, my bedroom has a very welcome splash of colour to compliment my super-colourful ripple.
With the rest of the half metre (and part of another bee!) I made a big square cushion to sit on my bed. The coordinating fabrics are from fat quarters from the rest of the Ruby Star Spring line and some plains I had in my stash. It was always going to be a difficult to make something that wouldn't get overpowered by the ripple, but I think this bee holds its own marvellously.
I am camped out in my sewing room crafting to my heart's content this week (and last week too!) as my kitchen is being decorated and so I have been booted out of my usual haunt! It looks like this today and I'm looking forward to seeing the finished new look by the end of the week.
*This little video made me smile so much when I first saw it last year.
Saturday, 16 July 2011
A finished object...
I actually started this cushion last year when I was on holiday in Portugal! I'm not really sure why I stopped hooking it because I was loving the colour combinations.
It came out of my hibernation a week or so ago and it has been amongst other projects on the worktable.
I took a bit of chance in my method of making it into a cushion and ended up tacking it to a piece of leftover quilt backing so that I wouldn't make a hash of machining it together with the back of the cushion.
The extra bits of the hexagons are just tucked inside and virtually unnoticeable from the front. Pattern from here.
I like this shape cushion and it is snuggled nicely in amongst the others on the sofa in the conservatory.
I'd like to make two more smaller cushions to replace the original sofa ones at either end but for now, two more projects have taken priority. More of which soon.
Tuesday, 7 December 2010
7 :: The Den, part 2…
As promised, this one is all about the cushions. They have been mentioned briefly before here and here but now I can reveal them in all their glory.
I bought the pattern from Oh, Fransson ages ago just because I liked it and so it sat in my documents waiting for inspiration to strike. I had to adapt it slightly because I wanted rectangular cushions rather than square. I just followed the basic construction of the wonky blocks until I got the pieces to fit my cushion pad. I was on a much tighter fabric allowance, particularly with the linen than what was suggested in the pattern. In fact, for the cushion below, Elizabeth said to use the plain fabric on both sides of the printed fabrics and then you cut them off afterwards and I certainly couldn’t afford to do that with my linen.
As I mentioned before, the grey linen is from here and is just wonderful. The colour is perfect and it was so good to work with. I had no fear in machine-quilting the layers together. I decided to buy a fat quarter bundle of the Birch Fabrics from Ray Stitch after seeing it at Fabricworm back in the summer.
Also, I didn’t want to put zips in, so I made envelope backs as is my usual practice. This time I decided to move out of my comfort zone and experiment with the one-step buttonhole foot on my sewing machine. I selected some coordinating buttons from my button jars and added three to the back on the closure. This also saved some linen as I didn’t have to have extra forming the flap underneath because the buttons stopped it gaping.
This one uses All Star 2 that I bought from Hawthorne Threads. Their delivery is superb – sometimes my fabrics arrives quicker than it does from the UK!
For this one I used a variety of fabrics that went with the bee fabric that I bought a while ago, (from here, I think) and the gorgeous Anna Maria Horner voile from Saints and Pinners, plus some grey geometric from my stash.
I love the buttons on this one.
For the last one, I used up the remaining fabrics from the bundles I had bought, in an effort to tie them all in together.
I think the difference in colour of the linen on three of the pieces is where it was starting to get really tight in the linen quantities and so I think the weave must be going the other way!
The cushion pads are 40 x 60cm and I bought them from John Lewis.
I have ideas for some more cushions to go with these, but it is a good start and they have got the seal of approval from No2. So I’m happy!
Thursday, 11 November 2010
My creative space...
...is still all about chopped vegetables. I have got four cushions to make and the grey linen is the common fabric to them all, to which I am adding an assortment of other prints including these mustard, grey and brown ones, and these ones that I started earlier in the week.
The third cushion will feature these fabrics and the fourth one, a combination of them all.
More creative spaces here.
Tuesday, 9 November 2010
Distracted...
...by this gorgeous grey linen coupled with this groovy organic cotton...
...that is yielding this pleasing pile of scraps...
...as I make these cushions for some furniture that is arriving next week.
When I should be writing, cleaning, ironing, baking or any number of other jobs that really ought to take priority.
Tuesday, 26 October 2010
October rain...
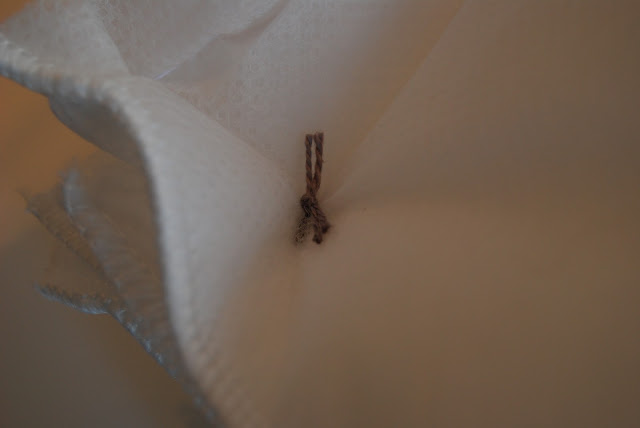
I always use these really cheap (£2.59!) duvets from Ikea for his bed. They last a couple of washes and I don't mind throwing them away when they are too dog-eared. (Sorry!) To make his new cushion really comfy, this time I splashed out and used two together. The convenient thing is that if you fold them into four, they fit perfectly in his basket. I tied them together using some embroidery thread so they keep their shape as he does like a fidget about.
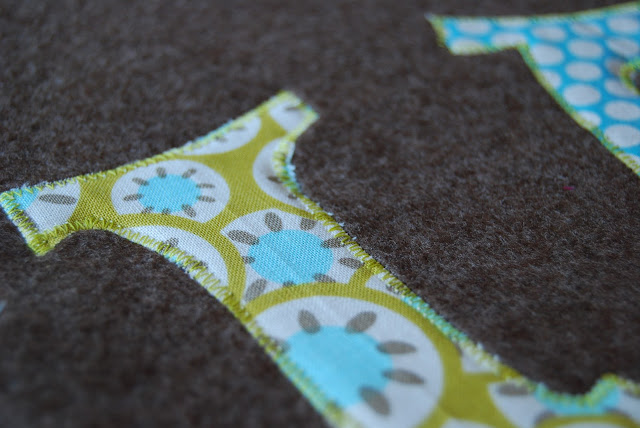
As I had a couple of hours to kill, I thought he might like to know that his new cushion was, indeed, his. Of course, he can read! I raided my scrap drawer and used some bondaweb to cut out his name.
I then used a narrow zigzag stitch to complete the applique.
I used the same stitch to make the Oxford-style edge to the cover and lazily kept the lime green thread in the machine!
Now he knows his place and it is making everyone smile when they notice it.
Look at him, all soppy. He is a ridiculous dog! He takes that toy everywhere with him.
Ah, well... I think it may have stopped raining...


